First run
The fastest way to understand Salience is to point it at a real project and watch entities appear.
1. Add a project
Open Salience and click Add project in the sidebar. Pick a directory on your machine — typically the root of a git repository. Salience will scan it for a .git folder and (optionally) a salience.toml.
If the directory is a git repository, your local branches show up immediately as entities of type git.branch. No tools connected yet — this is local data only.
2. Connect one tool
Open Connections in the sidebar and pick one tool to start with. GitHub is the most common starting point:
- Generate a personal access token at github.com/settings/tokens —
reposcope is enough for a private repo, no scope is needed for a public one. - Paste it into the GitHub field in Salience.
- Save.
Within a minute, open pull requests for your project show up as vcs.pull_request entities.
3. Look at the result
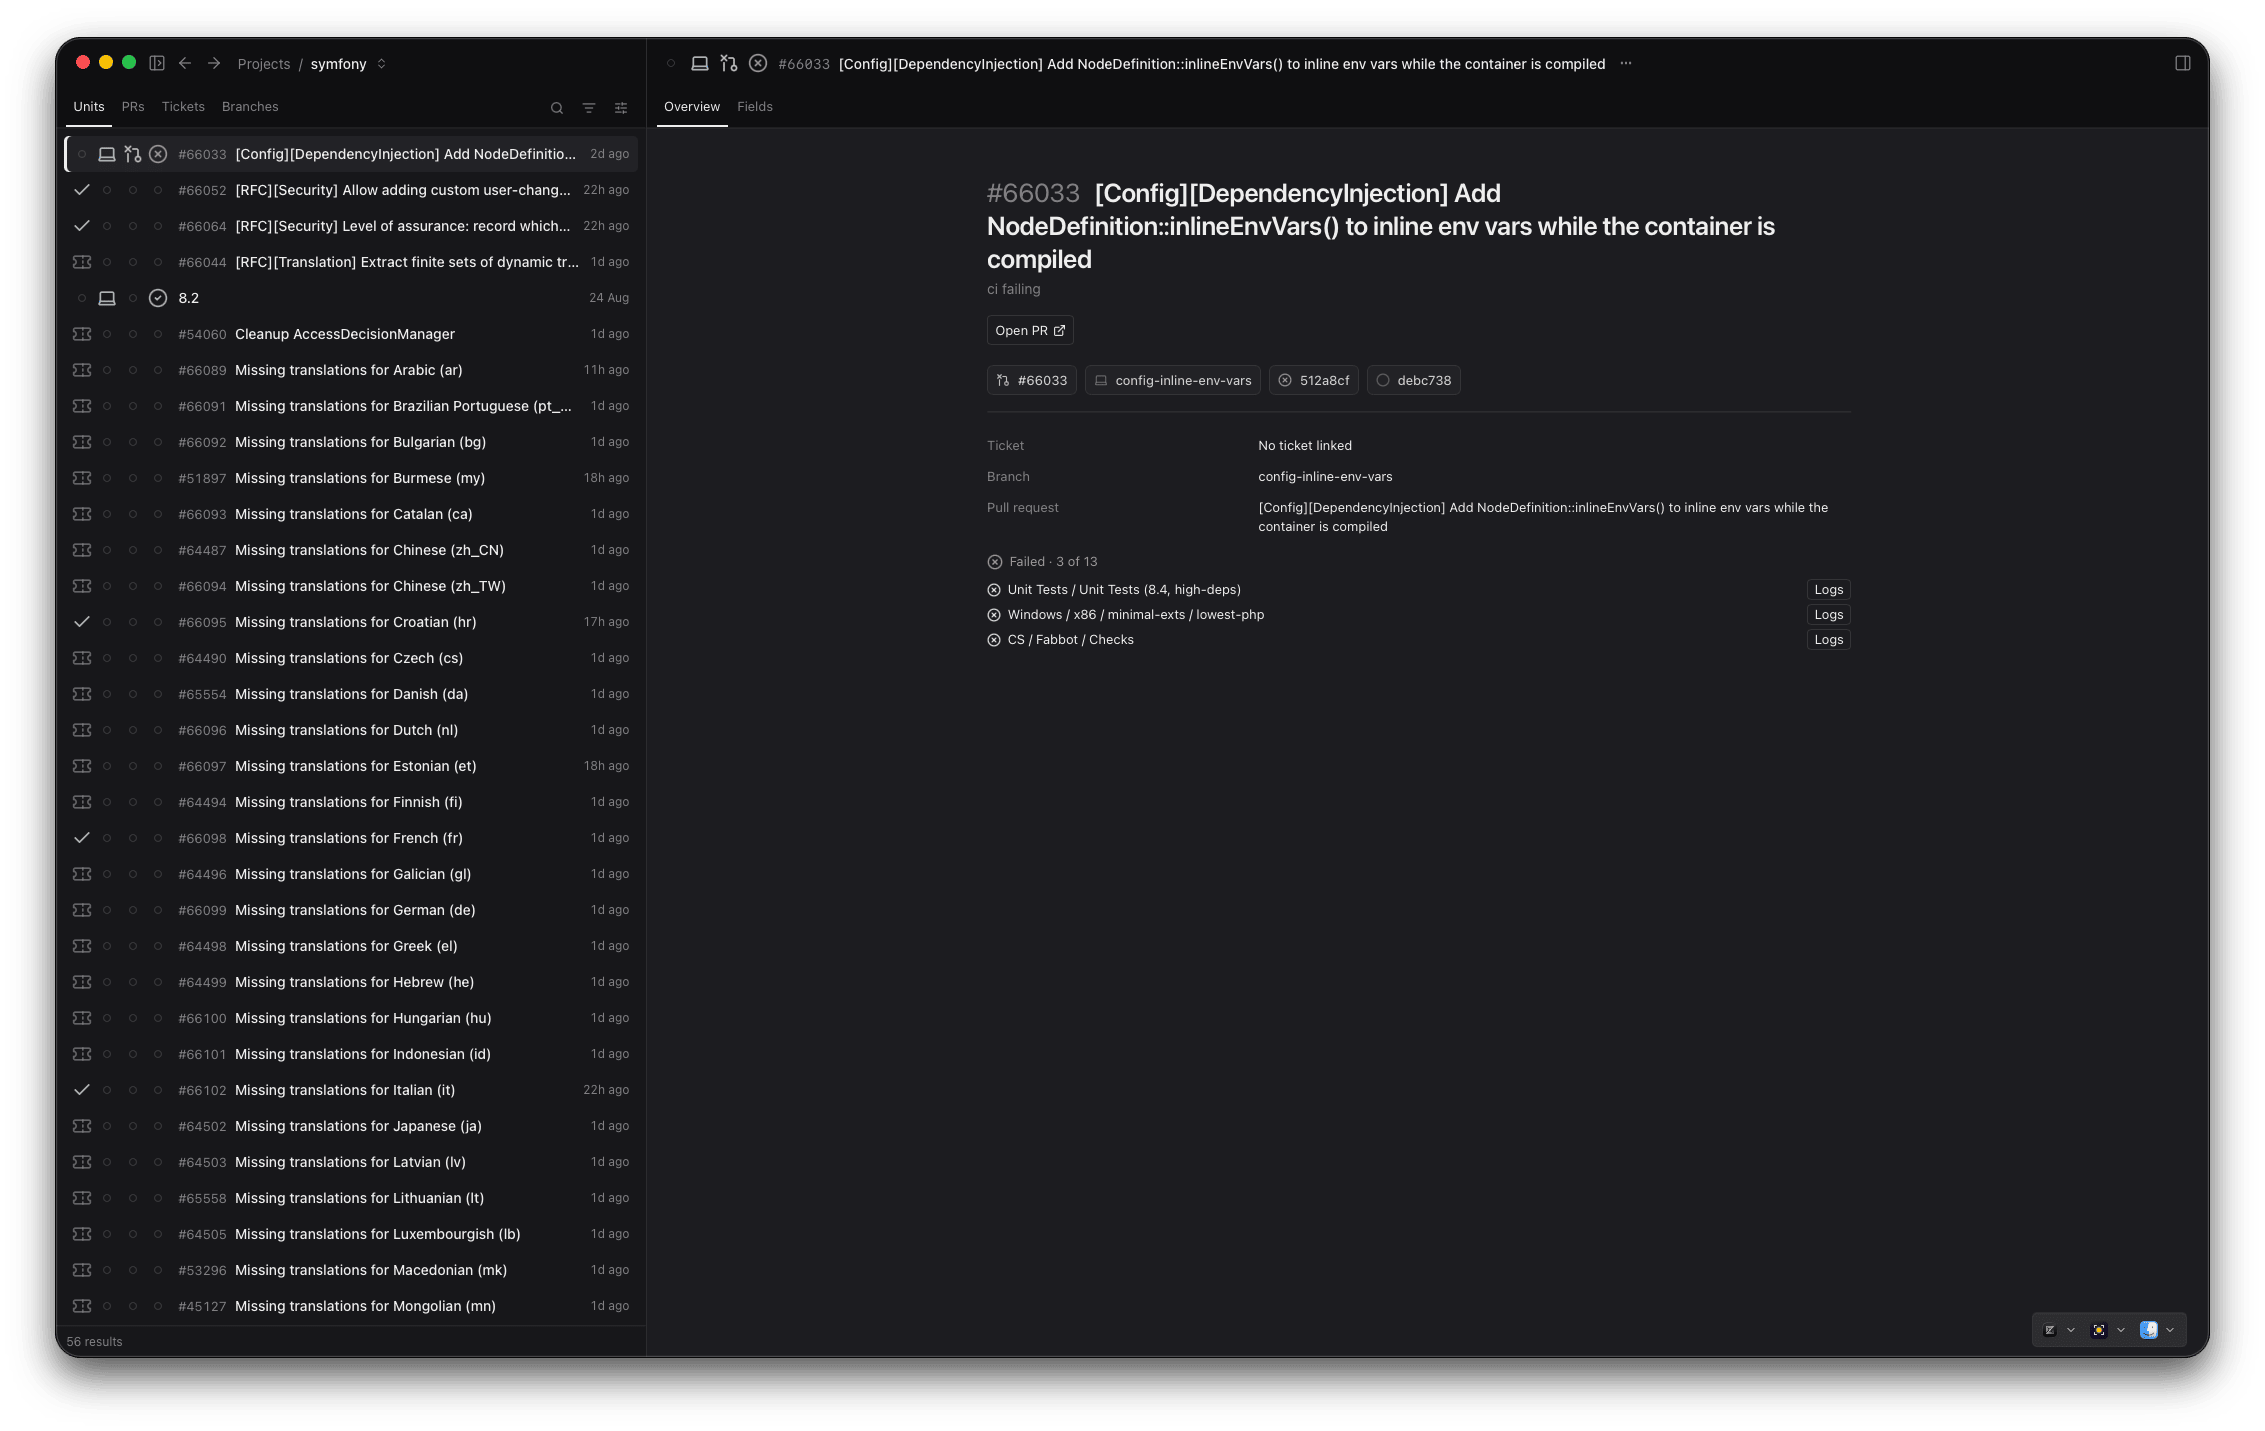
Open Entities in the sidebar. The Units tab joins each branch with its PR, ticket and (if a token-bearing CI is configured) CI checks into one row; select a unit to see which checks failed and open the logs. The PRs, Tickets and Branches tabs list the same data by source.
Dashboard is the same data as tiles — a board of units by state, a diff viewer, your containers and their logs — laid out however you like per project. Both surfaces are the entity store, rendered.
If anything looks empty, give it 30 seconds — the GitHub sync runs every 5 minutes, but the first one fires immediately on token save.
Next
- Connect your tools → — full list of supported integrations
- MCP server → — expose this same context to your AI agent
- Privacy & security → — where your data lives